Anatomy of an arcade stick
The response was unanimous: every person I asked preferred TaeYeon design #2 so I placed my artwork and plexiglass order with ArtHong. It’ll probably be two weeks before the goodies are delivered, but I decided to get the hard part out of the way and prep the arcade stick for the artwork swap.
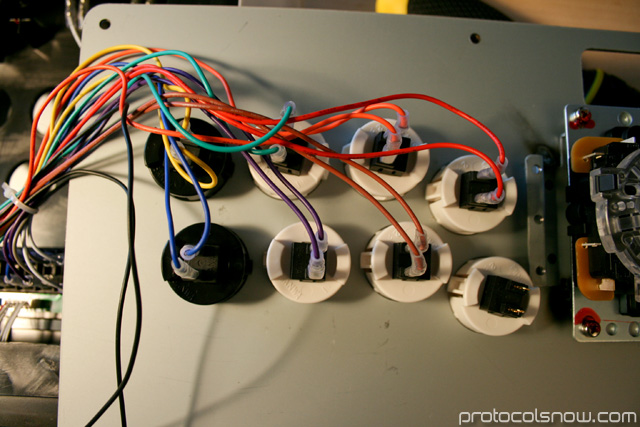
I successfully followed this detailed tutorial to open up the machine and get everything ready. Since I was taking photos along the way to document the process, here’s my own version of the tutorial. Switching artwork is much more involved than you might think and requires essentially disassembling the machine. However, don’t be intimidated as it’s not nearly as difficult as it might appear. This was by design — MadCatz consulted pros to build a very modder-friendly machine with the SF4 TE arcade stick.
This is the first time I’ve modded a stick and the procedure was relatively painless. If you are interested in customizing your stick but are hesitant about the work involved, I encourage you to give it a shot!
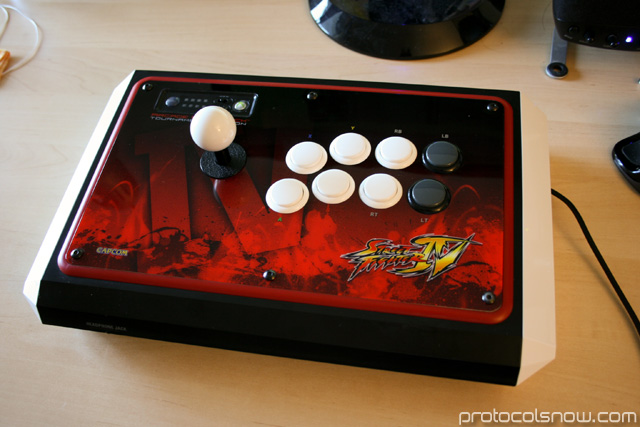
The Madcatz Street Fighter 4 Tournament Edition stick has virtually overnight become the de facto tournament stick. The vast majority of players at EVO 2009 seemed to be playing with TEs. It looks sharp out of the box, but wouldn’t it be nice to customize it and have an unique stick?
First thing you need to do is get a 3mm hex key and remove the 6 screws on the surface. Chances are you won’t have the right tool at home, but you can buy a set of hex keys at Home Depot or Lowe’s for about $5.
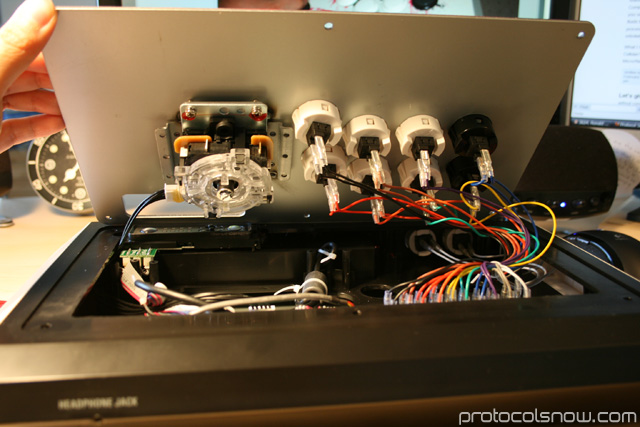
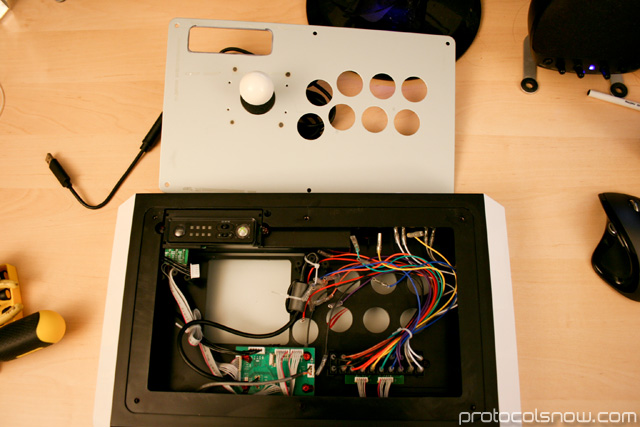
Once the screws are off, lift the metal plate by pulling on the joystick. This is what you’ll see. Be careful not to pull too far because all the components are still hooked up to the wiring.
The stock red artwork is mounted on the surface of the metal plate but underneath the buttons, so removing the buttons is necessary to change the art. That’s the whole reason why we need to open up the machine actually. Since all the buttons need to be popped off anyway, this is a perfect time to customize the buttons and/or joystick if you’ve ordered some extra parts (LizardLick is a popular store). I won’t be doing that because my art template has a black-and-white theme that matches the stock parts.
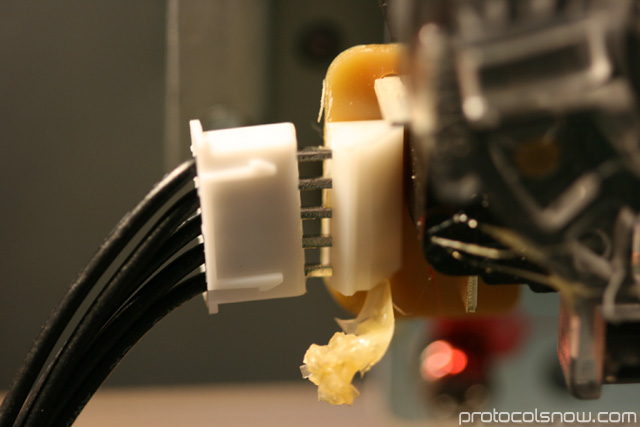
It’s not necessary to disconnect the joystick cable, but the rest of the process will be much easier if you do so. There will be yellow glue smothered over the connection so chisel away at it with a flathead screwdriver until you can peel away the glue and disconnect the cable.
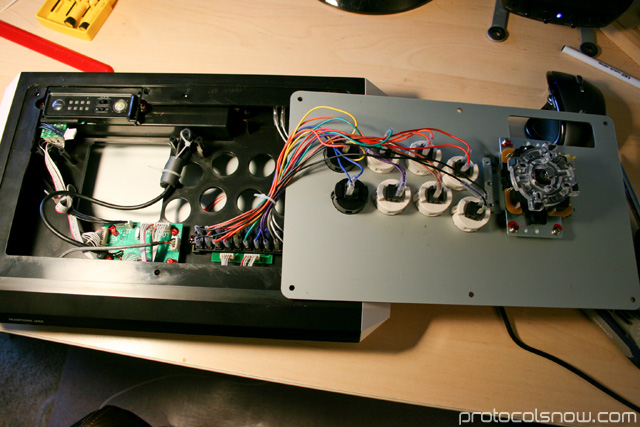
With the joystick cable disconnected, we can flip the metal plate to one side and have much more room to work on the buttons.
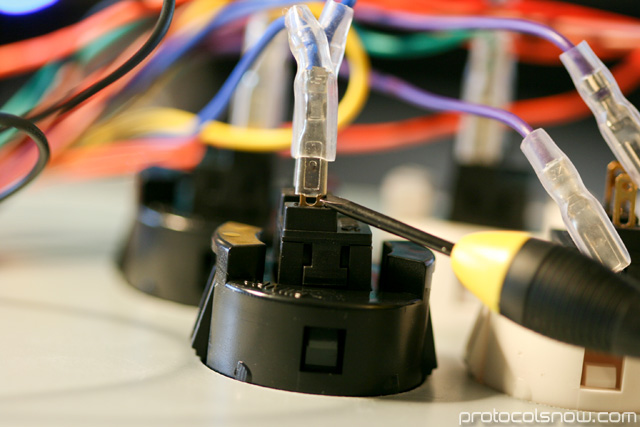
The buttons are hooked up to “quick” disconnects. The name is a bit misleading because disconnecting the wires from the buttons is the hardest and most time-consuming part of the entire procedure. First, peel back the plastic tube enclosing the wire. Wedge a small flathead screwdriver between the wire head and the button plug, then pry the wire head off by twisting the screwdriver. Work both the left and right sides and with any luck, the wire should smoothly pop off.
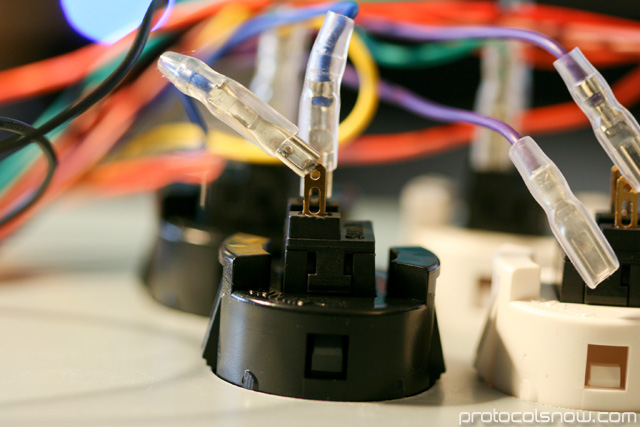
However, some of the wires are connected extremely tightly. These wires are more frustrating to remove, and you may be tempted to use pliers to forcefully pull off the wire. While an option if you’re extremely careful, I would caution against this as you might end up destroying the button.
My only suggestion is to try using flatheads of various sizes and continue working away at it. Wedge the screwdriver in any gaps between the wire and the plug, then twist to try popping the wire. Try different angles and work 360 degrees all around the wire. I had two really tight wires that were a pain to remove, but persistence paid off.

Whew, all the wires have been disconnected! Now you have to remove all the buttons. Each button has two tabs on the sides that hold the button in place within the metal plate. I found it easiest to push down one tab and forcefully push on that side until the button popped through, then repeating with the other side. The buttons are tightly wedged in so apply a good deal of force.
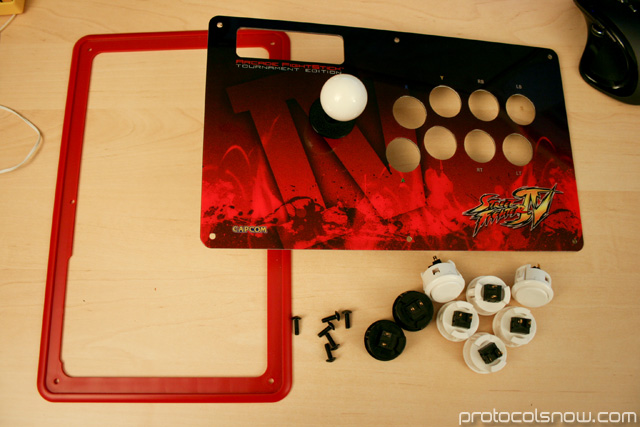
Disassembled pieces. We’re almost done! The original artwork of the stick is stuck onto the metal plate with a weak adhesive. Removing the artwork is as simple as peeling it off in one piece. (I forgot to take a photograph of this, but you’ll also need to twist off the joystick ball before the art can be completely removed. The bottom of the joystick has a flathead screw; use a screwdriver to hold the joystick in place and twist off the ball.)

I’m all ready! Now to wait for my artwork and plexiglass to come in the mail. Part 2 will be posted when I get them.
UPDATE: Completed project!
